Cross-platform installation files for fldigi are available from:
Installation files for AndFlmsg, a combination of fldigi and flmsg for portable devices running Android, are available from:
Download the fldigi installation file for your computer operating system and save it on your computer. Run that file to install the application; it will install like any application on your operating system.
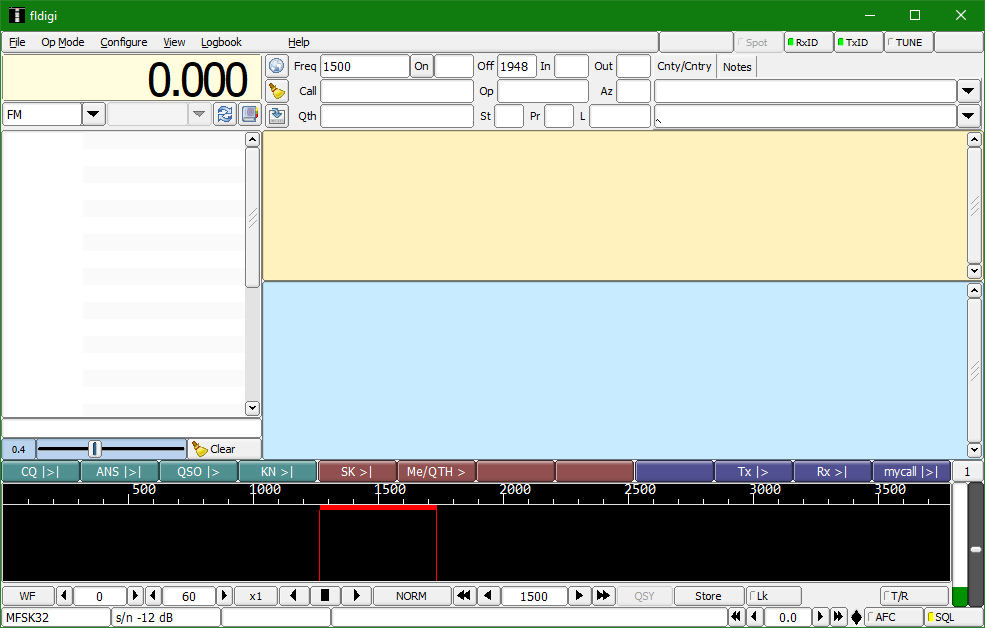
Now, with any interface device and cables disconnected from your computer, launch fldigi as you would any other newly-installed application. The application's window is shown here. (Your copy of fldigi may look a little different; the user interface can be modified in many ways!) Note the three large horizontal panes and one vertical pane:
In fldigi's default view, there are some additional features at the top, including a frequency display (by default you'll see "0.000") and mode indicator at the left side. At center and right are logging fields. The frequency display and mode indicator become active and potentially useful only when you are using rig control, which enables fldigi and the rig to communicate information back and forth and allows fldigi to control the rig beyond merely initiating and ending transmission. Rig control requires a cable and a rig that supports it, and isn't necessary for the activities covered in this course. The log controls are useful if you want to record details of a contact you have made, an activity more interesting to contesters and ragchewers. However, others may find the "Call" field useful, as described below under "Logging~Call Lookup" under the Configuration heading. You can adjust the size of, or hide, these controls by using View|Rig/Log Controls. (See NBEMS menus and configuration for help with the "W|X" and "Y~Z" method of describing software menus and configuration.)
The following instructions for configuring fldigi are tailored to this course's intended audience, hams who expect to operate in the FM mode on the VHF and UHF bands and who plan to use fldigi primarily for participating in local digital nets, on simplex or repeater, and for communications with other hams who they know. These instructions will therefore omit steps that might be important for other uses.
As you configure fldigi initially, and at any later time when you have changed a configuration item, and you then close fldigi, you will be given a choice to save or ignore the configuration changes you have made.
Now, with fldigi open but not connected to your transceiver, use Configure|Config Dialog. (See NBEMS menus and configuration for help with the "W|X" and "Y~Z" method of describing software menus and configuration.) This opens the Fldigi configuration dialog box, where most configuration settings are made. Note the column of choices along the left side. Pressing a "+" icon opens additional choices. At bottom right are the Save and Close buttons. It is a very good idea to press the Save button frequently as you do your initial configuration. If you really mess up, you can use the "Restore defaults" button at lower left. Click the Close button to close the Configuration dialog box.
In the Configuration dialog box:
Now press the Save button to save your configuration changes and the Close button to close the Configuration dialog box.
At "File|Text capture", check this checkbox; it preserves a detailed text log, including timestamps and codes showing the beginnings and endings of transmissions. These logs are saved in the fldigi.files folder as files named fldigiyyyymmdd.log. (Once you have used fldigi a few times, compare the contents of these files to the file created by enabling "Misc~Rx text capture" in the Configuration dialog box, discussed above.)
Because you are unlikely to find the channels pane useful in the VHF/UHF FM environment being discussed here, you may wish to hide it by using "View|View/Hide Channels". (This control is a toggle, so you can do the same thing to bring it back.) On the other hand, having this pane open causes the text lines in the receive pane to be shorter, which may make for easier reading.
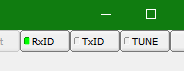
Near fldigi's upper right corner, locate the RxID and TxID buttons. If they do not contain green "lights", press each of them until they do. With RxID on, your copy of fldigi will "follow" a change of operating mode and/or of waterfall tuning indicated by an RsID signal created by the sender. With TxID on, your copy of fldigi will insert an RsID signal into transmissions it makes. (In nets, it is usually a good idea for only the Net Control Station, or NCS, to have TxID on.)

At fldigi's lower right corner, the SQL button controls receive squelch. If the SQL control is turned off, the button's "light" will be off. If the SQL control is enabled and actively removing noise, the light will be green; if enabled but set at a level above the current noise level, the light will be yellow. The squelch level is controlled by the vertical slider just above the right end of the SQL button. The incoming signal level is shown as a vertical green bar to the left of the vertical squelch control bar. For VHF/UHF use, radio hiss can also be controlled with the transceiver's squelch control. Squelch can reduce the amount of nonsense text due to radio hiss that is displayed in the contact pane. The disadvantage of using squelch is that you may miss a signal that you could otherwise receive. If you turn squelch on, use as little as possible, and don't forget that it's on!
Also at fldigi's lower right corner, just to the left of the SQL button, the AFC button controls the automatic frequency control function. This course will mostly use MFSK operating modes, and I find that AFC can have negative effects on reception of MFSK. I suggest leaving AFC turned off (no light) while taking this course, and I suspect it is not very useful with FM VHF/UHF signals anyway.
I expect that the reader will be using FM on the VHF or UHF bands, either through a repeater or simplex. In this situation, as you operate you are unlikely to encounter any digital signals other than those of your net or of your friends with whom you are meeting to practice. Your net or group of friends may have its own default digital operating mode and its own waterfall tuning frequency, and in that case, use them. Otherwise, I suggest using the MFSK-32 mode and the 1500-Hz tuning frequency as your defaults. These settings are in wide use on HF as well as on VHF/UHF. The MFSK modes are very robust and support the transmission of images. MFSK-32 operates at a moderate speed that is compatible with "keyboard chat" transmission, which this course will soon discuss. The 1500-Hz waterfall tuning frequency will usually be well within the receiver's passband, allowing even wide modes centered on that frequency to avoid attenuation at the edges by your receiver's filters. Centering signals above 1200 Hz on the waterfall also prevents any second harmonic of a transmitted signal (which would appear as a "ghost signal" at double the transmitted signal's audio frequency) from getting in the way.
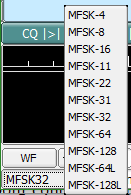
Operating mode: To set the operating mode ("OpMode"), use the OpMode menu item. To select MFSK-32, use OpMode|MFSK|MFSK-32. You can at any time determine which OpMode you are using by looking at the button at fldigi's lower left corner. You can change to other "flavors" of the current mode by left-clicking this button and selecting the desired "flavor" (see image). For example, to change quickly from MFSK-32 to MFSK-64, you can left-click on the button and choose MFSK-64 or any other MFSK mode.
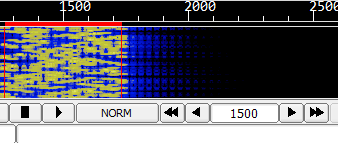
Waterfall tuning: The waterfall tuning is (generally) the audio frequency band within which fldigi will interpret signals. A 1500-Hz tuning means that fldigi is expecting to receive, and transmit, a digital signal centered at that audio frequency (or, in other words, centered at that musical pitch). To select a 1500-Hz tuning, left-click in the waterfall pane as close to 1500 as you can. Now inspect your result in the box on the row just below the waterfall pane and just to the right of center. If it is not at 1500 exactly (though in most cases a few Hz either way won't matter) use the left and right arrow buttons on either side of the frequency reading. (Single arrows will move 1 Hz at a time, and double arrows 10 Hz at a time.) fldigi will outline in red the expected location of the digital signal given your selected operating mode and waterfall tuning.
Keeping in mind that other materials about configuring and using fldigi that you might find on the net may have different assumptions about your intended use of the program (HF, single sideband, contesting, ragchewing, and so on), here are some of those materials: